Projects

Articles about projects you can do yourself

How to Play Native American Flute

2 Biggest Mistakes Getting Started

In getting started learning how to play Native American Style Flute, first, we must eliminate the two biggest (but easily-avoidable!) mistakes that will make the tone crackle, jump or misbehave.

Native American Playing Flute

Pic: T. Gray, Public domain, Wikimedia Commons

Great tutorials that have tremendous technical insight often skip these #1 “unboxing” essentials without which the rest can be useless.

After the following, you can jump right into fantastic, free resources all about technique, or you may sound like a movie soundtrack today, even before anything but the following tips.

1) The adjustable, removable Block is set precisely = absolutely critical
2) Your fingers are truly, thoroughly sealing the holes (they will fool you)

Additional, supportive tips are included, as well.

How to Play Native American Style Flute

1) Block Placement

If the “Block”, “Bird” or “Totem” (same thing) is out of position at all it can leak air or misdirect air, and even tiny differences make or break performance. If you need reading glasses, you must use them here. You don’t want it sitting crooked nor slid too far forward or backward.

You should understand how it works so that this and several related issues like water droplets in the flue are intuitive for you as a non-issue:
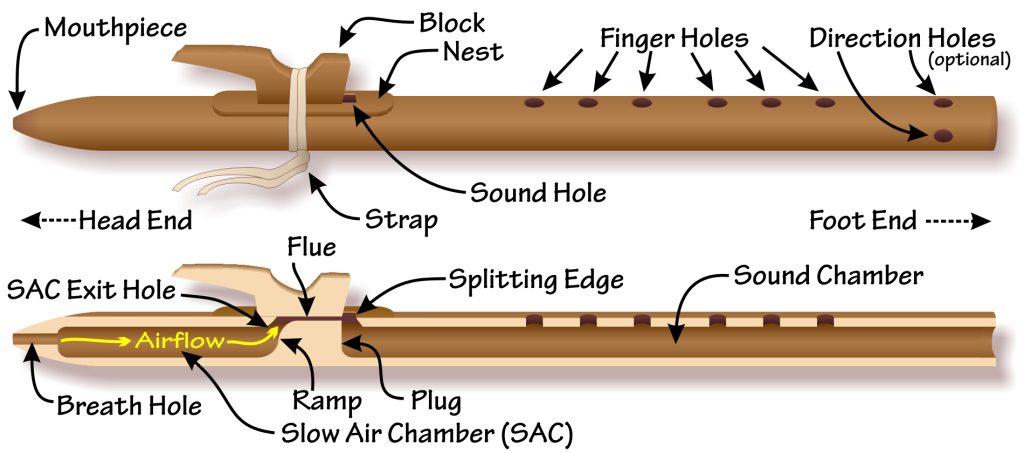
Playing Native American Style Flute: Anatomy

ClintGoss, CC BY-SA 3.0, via Wikimedia Commons

Your Block helps direct air flow through the flue, then across the top of the open Sound Hole and into the Splitting Edge.

Important: The Plug forms a little “wall” inside the flute separating the chambers and also forming the Head End side of the Sound Hole.

The diagram above shows the bird slid up perfectly even or flush with this wall or Head side of the Sound Hole (see Plug in the diagram and where the front of the bird is just above the plug).

So: This is a decent starting point, many flutes put of “like” the bird here, but many flutes (like most of ours) also like the the bird slid back toward your face a millimeter or so. Here is a view looking down at an Otter Lake flute nest – as you can see the bird is slid back about a millimeter and a half or so back away from this side of the Sound Hole and the inner wall the Plug forms:
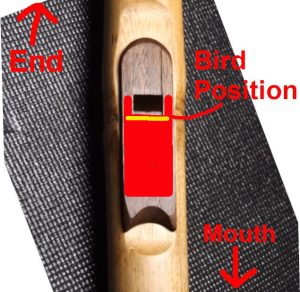
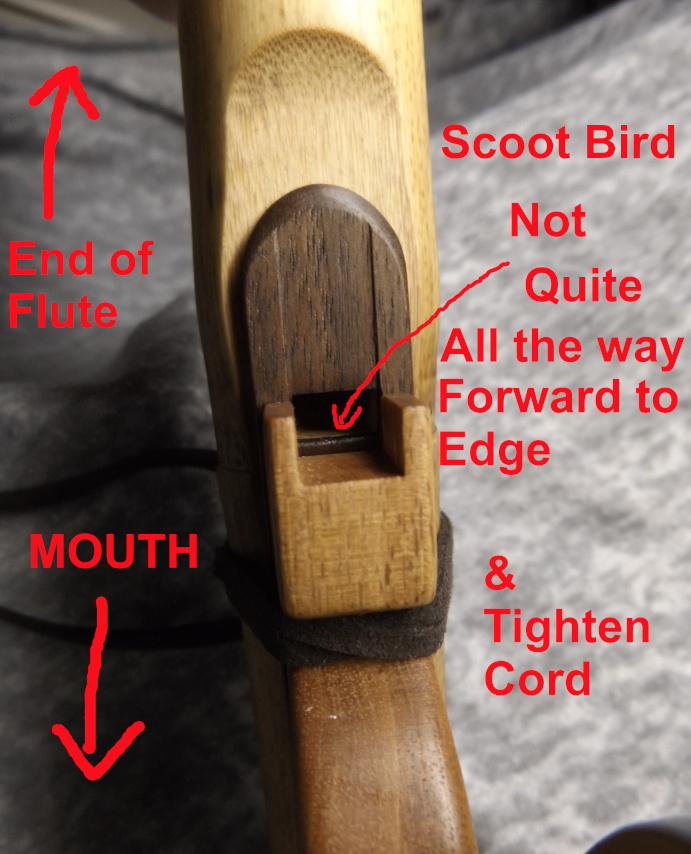
Learn Native American Flute Playing

Thanks for bearing with my quick diagrams initially meant for a friend, but they work.

You can try slightly forward or backward positions by a mm here and there, but with Otter Lake flutes, unless instructed otherwise for a certain model, please begin about 1 mm to 1.5 mm back from the aforementioned edge.

Also, of course, the bird should be centered (not over to one side) and straight (not crooked).

Any debris or damage on or to the next can cause a tiny air leak that will cause malfunction.

How to Play Native American Flute:

2) Proper Finger Hole Sealing (!)

Important: Even folks in person will try to gloss past this while accidentally violating it.
That is: they have one or more fingers over holes they think (and insist) they are sealing closed properly, with the pad of their finger, but you can press their fingers down and the problem, goes away.

We’re not saying as a player you have to press really hard on the holes as a rule, but as an exercise and definitely in troubleshooting – when the flute misbehaves, press your finger pads down very hard in the center of all holes you’re trying to cover.

Maybe try looking at different angles on a mirror or have a friend look at you. I frequently see visible leaks (like black crescents!) around holes people are swearing they are covering.

Congratulations!

That covers the two biggest mistakes that kill a Day 1 experience (or flute review)!
Block misplacement after unboxing or travel, and a leaky finger hole. Seriously.

From here the sky’s the limit. We’ll include how to hole and operate:

How the Hands are Used:

Your left hand is closer to your face, your left hand covers the furthest, “South-most” or “foot-most” holes.

The hole numbers of the flute in this tutorial are labeled as makers and some teachers label them: in the order they are normally released, furthest or South-most hole is Hole #1, while the one closest to your face (usually the last hole or so uncovered) is Hole #6.
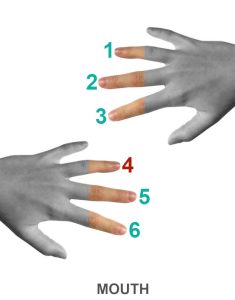
How to Play Native American Flute with fingers

You just use your thumbs to support the flute, and pinkies are a matter of preference, one here, one there. You may let both pinkies float like using fancy teacups, or use one or more to stabilize the flute wherever you like. Jon Norris and Jeff Burris use both raised pinkies, double shot glass-style.

To play the standard pentatonic minor scale, here are the primary fingerings. After this, to reach extended scale notes or to play a full chromatic octave, cross-fingerings are used which is for a more advanced lesson. This gives you the 6 primary notes (pentatonic minor 5 plus the fundamental note repeated in the next octave):
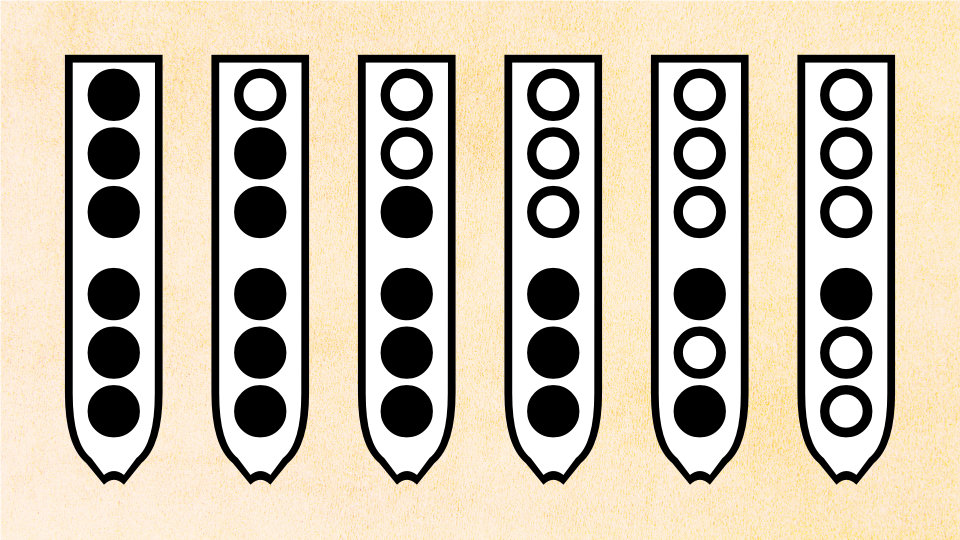
ClintGoss, CC BY-SA 4.0, via Wikimedia Commons

FYI: "Wet Out"

Wet Out: this is when you play long enough for water droplets or beads to form in the Flue (see diagram for Flue) under the bird, due to breath moisture. Water beads will obstruct just enough air to create turbulence and crackling, jumping higher in tone (unintentional Overblow into a higher note) and other issues.

Fixing Wet Out: It is not necessary to remove the Block but a few times in years, often. You can simply blast the water out of the flue with a louder toot (sometimes intentionally worked into music). Others make a flinging motion but this is ill advised because it asks for an eventual accidental impact with a mic stand etc. Some have multiple flutes and let one dry after a song. Ask your flute friends how they deal with wet out. We seal and make slick the flue as much as possible so droplets eject easily. Some add beeswax, flute wax, Odie’s Oil, or Rain Guard for car windshields!

Amazing Journey

Two excellent tutors for the Native American Flute are Johnny Lipford and Clint Gloss.

Johnny has fantastic music and Clint and Vera have an incredible site at Flutopedia.com that pioneered bringing details of construction and many other subtopics to the general public in a manner so comprehensive that, before it, you really needed to spend hundreds on very limited textbooks. I can’t even get started naming quintessential native players to listen for like Mary Youngblood.

Some Standardized Terms

(standardized by various makers, not necessarily original or Indigenous names)

North = Head end of the flute (where your mouth goes)
South = Foot or furthest end from your face
TSH = True Sound Hole (sometimes just the Sound Hole)
SAC = Slow Air Chamber, the first chamber after the mouthpieces’ Blow Hole
Flue = the passageway under the Block directing the air at the TSH and Splitting Edge
Splitting Edge = South end of  TSH: an upside-down wedge creating the whistle!
Nest = where the Bird (Block) sits!
Block = Bird or Totem. A removable flue ceiling often shaped decoratively or with nuances to direct air
Hyper-Octo Quantum-Squeegitude = just kidding

In Closing

Despite this being the easiest instrument we’ve ever played, some unfortunate folks have even gone as far as returning a Grade-A flute for a refund (usually where helpful, home-website tips are missing, like Amazon) complaining it’s difficult or even defective (when it’s neither, of course). This only ever happens because of something that would take two minutes to correct in person… or here!

Enjoy.
We praise God for our blessings with this craft and community.
Jeff & Tina Burris

Special Thanks also to:
Jon Norris
Clint Gloss
Edward Kort
Johnny Lipford
Hawk Henries
Bob Grealish
Native American Flute Makers Forum
Mono Loco

How High Can a Drone Fly?

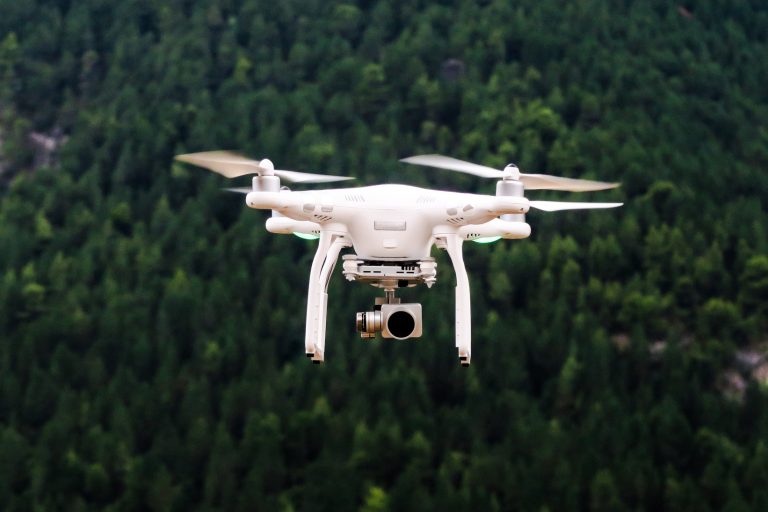
When asked how high a drone can fly, our first thought should be safety, which is tied closely to Federal Aviation Administration (FAA) rules. The general rule of thumb is a drone can fly 400 feet above ground level (with many caveats and a few exceptions). A few notes on physical altitude limitations of actual drone flight capability are below the following notes on regulations.

high-flying drone photo by Janson Blackeye

Licensed versus Recreational

How high a drone can fly is tied to different zones of airspace and what you’re authorized to do. One of those distinctions is whether or not you’re licensed. Theoretically, operation of any drone up to 55 pounds requires an unmanned pilot’s license that, between tests and fees, can easily cost more than a cheap drone, itself. This is according to the FAA’s 14 CFR “Part 107”, also called the Small UAS Rule. Section 336 or the Special Rule for Model Aircraft was created to allow casual hobbyists to operate drones and RC planes without a Part 107 license (provided it is for pure recreation and fun, with no utilitarian or commercial purpose). This was called a “carve out” regarding Part 107. Section 336 was appealed and replaced with 49 USC 44809 which serves the same purpose but with additional restrictions and definitions.

How high a drone can fly legally depends, in some cases, whether or not you’re licensed. For example, there are considerations regarding buildings or other structures, allowing pilots to fly higher than 400 feet when flying above these structures, provided it is an area for which manned aircraft pilots also adjust their altitude accordingly, with the same structures in mind. This consideration, however, is reserved for Part 107-licensed drone pilots, whereas recreational fliers must remain 400 feet or less above ground level (at best, with further restrictions in some areas).

Zones

Additional rules and restrictions apply to how high a drone can fly depending upon whether it is within Uncontrolled Airspace, Controlled Airspace, what zone or Class (such as Class B etc.) and/or if it’s near an airport. You are encouraged to visit the FAA’s Resources to stay safe and compliant.

Physics

While most drones have a firmware limit restricting how high they can fly to 400 feet, and further software caps existing above 1640 feet intended for special authorization, various makes and models may have different physical caps on theoretical capability. A unit’s design, as well as air temperature (and thus density) would both come into play, but it’s generally estimated most would cap out between 6000 and 7000 feet, which is around half the record for a particular drone that reached an altitude 11,150 feet.

Uranium Ore Sale

Uranium Ore for Sale?

Yes, uranium ore is for sale online (see the best sources below). You can buy and own raw, unprocessed uranium and thorium ores in the USA as geological specimens for the purposes of education and even science hobbies involving Geiger counters, cloud chambers, and more. Some rock specimens may contain trace elements of interest while others can be as high as over 47% elemental uranium!

Uranium Ore

Where is Uranium Ore for Sale?

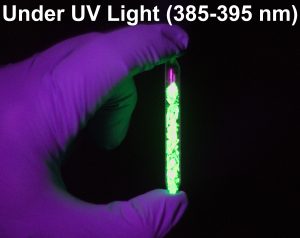
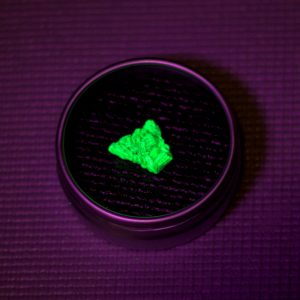
If you want to buy geologic uranium ore specimens that emit the highest highest levels of measurable radiation of any ore available, and even fluoresce (glow) brightly green in UV light (even regular “black light” i.e. no special prospecting light required) then you want to buy autunite (calcium uranyl phosphate) from:
Rocks Unlocked (RocksUnlocked.com) 
or try
Geiger Check (GeigerCheck.com)
You’ll also find other items like Jurassic Canyon uranium ore rocks and more to add to or even protect your collection from casual pilfering or small kids. The link above are the most affordable and reliable sources of this hard to find mineral no longer available on numerous other sources. We know because each of us own one of the other business and we each forged direct relationships with the miners. It’s no secret we all have the same IP address – we’re friends and/or owners that started out trying to find nice specimens as Geiger counter checks, and uranium glass left something to be desired (esp. if you have a lesser-sensitive device like a side-window probe).

Autunite Uranium Ore for Sale

When it comes to uranium that is for sale, legally, autunite (calcium uranyl phosphate) really hits it out of the park for radioactivity and fluorescent mineral hobbies. The glow really gives it that cinematic, radioactive appeal (although a little UV light is actually required) and the uranium is truly what gives it that classic day-glow green hue.

Vial of Uranium Ore

Autunite is composed of over 47% elemental uranium and even shows noticeable higher radiation levels than even refined, smelted U-238 metal called Depleted Uranium (DU)! How? It’s because unrefined uranium ore in the form of Autunite still contains small amounts of the more scarce and highly potent isotope U-235, as well as trace radium etc. These sister isotopes and elements naturally occur in the nuclear decay chain and, while low in amount compared to the abundant U-238, can make ore that’s only close to half uranium emit more radioactivity than industrial DU metal.

Uranium Ore Sale: Safety

Many, common things in our lives like products used for maintenance or even art can be highly dangerous if misused, but are also completely safe when handled and stored properly. It’s important to educate oneself about proper storage and handling of uranium ore before buying it.

In general, it’s kept in metal containers to shield much of the radiation and stored some feet from living things. The Inverse Square Law of radiation means it dissipates more per inch with each additional inch, so even just a few feet away any normal Geiger counter cannot even detect its presence and risk is abated.

The biggest consideration is getting particles inside of you, that’s why cleanup of oneself and any surfaces is important as not to ingest or even inhale small, solid particles that break loose, as was a common hazard of old school thorium lantern mantles, since they made fine ash.

With a little reading, care, and common sense, uranium ore is safe to buy and own. This is why it has always been legal and collecting it in the field was a even very common (at times viral!) family pastime in the mid 21st century!

Legality of Uranium Ore Sale

When you buy uranium ore online from our known sources you’ll always receive a package that reads below .5mRem/hr. On the parcel surface, with a label including text and numbers required by the NRC and USPS or or other carrier. This makes it perfectly legal as an “excepted package” exempt from many considerations that would apply to real hazmats.

Many, many people get confused about a piece of federal code by the Nuclear Regulatory Commission called NRC, 10 CFR, “§ 40.22 Small quantities of source material”. This is frequently misinterpreted as appearing to allow basically any US citizen to posses or even sell limited amounts of refined, radioactive products like DU and indistrial uranium or thorium compounds etc. as long as they intend to use it for constructive purposes. We have communicated directly, at length, with senior officers at the NRC and we can assure you this is not the case. To the technical letter of the law, this does not even apply to tiny samples.

First of all, section 40.22 is intended for institutions, and I quote Betsy Ullrich of the NRC, “…not private individuals”. Secondly sale or “|initial distribution” is prohibited by subsection (e) of said code without an additional, bona fide, applied-for-and-issued license that is difficult to obtain because it requires experts, considerable lab equipment, etc. Thirdly, 40.22 does not apply to 39 of the 50 US states that have become “Agreement States” meaning they have their own, state-level regulations including possession of radioactive materials.

The Answer: Stick with ore! It’s often prettier, can be just as active (or more, as show above), and is generally legal to possess as long as not misused (“generally” as in: there may be certain buildings, communities etc. where it is not permitted).

Autunite Uranium Ore Hunk

Because, like so many things, it is perfectly safe when stored and handled properly, unprocessed uranium ore has remained legal to buy, sell, and possess in the United States for many decades.

In the mid-1900’s Geiger counters and “scintillators” (amplified detectors for finding ore at distances) were popular recreational hardware with which families could go camping and prospecting, hoping to find and even sell uranium ore in a rather prolonged “uranium rush”. National parks used to issue pamphlets recommending safe practices in collecting uranium and taking it home (like washing hands and not keeping in pockets). While some precautions about nuclear materials have become more rigid since then, the more we know, most of it applies to industrial or military-related substances.

The Parks Service didn’t stop issuing such pamphlets referring to safe uranium-collecting fun because hobbyists got cancer from rocks or anything in subsequent years – they likely stopped because of negative publicity and lack of public understanding. Baseless stigma.

For example, 3 buckets of uranium-bearing rocks were noticed in a Grand Canyon National Park museum. When the story hit the press it went viral and everybody lost their marbles, reporting everywhere that thousands of people including children had been “exposed to dangerous, ionizing radiation”. Despite scientists and officials descending on the situation and determining no one was harmed or really even placed at risk because of the low amounts of uranium involved and the Inverse Square law etc., what mattered was public ignorance, not facts. The big story was the erroneous harm; the confirmation there had never been any danger was of little interest to the press (zero retractions and few follow-ups). So the Parks Service freaked out about their reputation (not safety) and bulldozed any and all uranium rocks far away from rest areas and public access (the the dismay of local hobbyists).

Legitimate Uses for Uranium Ore

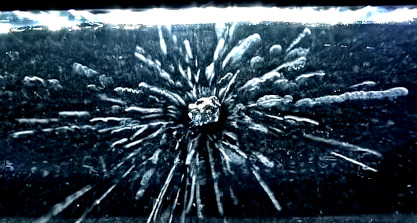
https://scihobby.com/how-to-make-a-cloud-chamber/When people have no interest in something they have little understanding (and often little tolerance) of it. One of the most common questions about uranium ore sale and purchase is, “What on Earth would anyone want it for?!”, asked with anything from curiosity to naïve, accusatory contempt suggesting inevitable villainy. To anyone bitten with the Geiger counter bug, the answer is self evident: because it’s cool. A more informative answer is that, besides demonstrating different levels of alpha, beta, and gamma radiation between different, collectible specimens (which is reason enough), other uses include source material for a cloud chamber (an easy DIY project that makes radiation leave contrails visible to the naked eye)…

a cloud chamber with uranium inside

…experiments with digital or film photography, building a spinthariscope (another device that makes effects of radiation visible, but in the form of sparkles) or other radioluminescence (glowing due to nuclear emissions) experiments with phosphors like copper-activated zinc sulfide, and much more. These demonstrations, experiments, and other activities are safely performed not only by hobbyists and parents but teachers and institutions who are among customers buying uranium for sale online.

What is the Best Geiger Counter?

Selecting a Geiger counter for your science hobby...

What is the Purpose?

When asking, “What is the best Geiger Counter?”, one must ask oneself, first, what the overall purposes mainly are. Geiger counters are not a one-size-fits-all. Since there are numerous interests or goals to consider before deciding, here, we focus on features to look for more than exact models.

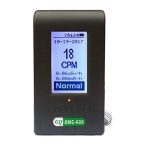
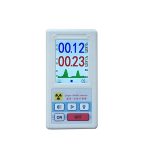
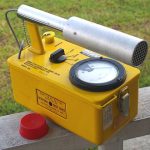
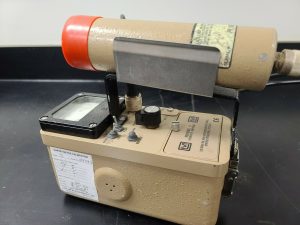
GQ GMC 600cheap geiger countervintage Geiger Counter CDV-700

Vintage or Modern?

Vintage Geiger counters like a old Civil Defense unit definitely win in the Coolness Factor category for a lot of people. A character in “The X-Files” or J.J. Abrams’ “Fringe” is likely to be sporting a sizable unit like a lunchbox with a wand and a needle gauge. This type of unit can be the most fun to use for anyone who likes the charm of older tech, but they can also need updating or repair, and lack modern bells and whistles and more.

Many modern Geiger counters can log and remember data with a timestamp for days on end. Often, they can connect to computers to build graphs or charts based on the data they’ve recorded. Digital displays allow for easy reading and even cycling through modes such as Counts Per Minute (CPM) or dose values such as Rems or Sieverts.

A Note on Reading Rems or Sieverts vs. CPM :

Since Geiger counters may measure counts more accurately than dose equivalents, remember that two perfectly operating, freshly calibrated Geiger counters can easily give you dose readings around 20% different from one another because they were set up using different calibration sources (for one thing). You either have to take dose readings on Geiger counters with a grain of salt or know what isotope your unit was calibrated to (dose-wise) and how similarly that applies to your target check source material for accuracy.

Geiger counters can only read counts, not energy levels. They merely convert CPM to doses by using a static mathematical conversion formula, and this formula is different for different source materials because they each yield counts that are worth differing amounts of energy per count. A Cs137-calibrated unit will be off, dose-wise, when measuring Co60 and vice-versa.

How Sensitive Must it Be? (A Biggie!!)

Different Geiger counters often don’t even display even remotely the same CPM as each other. One of the biggest misnomers is that two properly calibrated Geiger counters will always get the same CPM reading as each other when sharing a check source at the same distance or spot. This is actually quite incorrect (easily by a factor of 5x or even 20x) and leads to puzzled complaints by buyers of geological specimens, to the sellers, wondering why they get a lower or higher reading than advertised. This is because one of them is using a more sensitive probe than the other.

The Nuclear Regulatory Commission also regularly receives reports that someone shipped someone else a package that was emitting well over the legal limit of radiation for the type of container or labels they used. This is because a less sensitive Geiger counter was used at the origin to test the package surface before release, then an unnecessarily sensitive unit or probe was used on the receiving end, freaking out the recipients without cause.

This is mainly because of differing probes being used, and all may be “correct” despite major disparities between levels displayed. Some probes are inherently less sensitive than others, and you can’t simply compensate by making electronic adjustments during calibration. If an end-window probe is 5x less sensitive than a pancake probe, you can’t just crank up the electronics to be 5x more sensitive for the end-window probe, to compensate during calibration, in order to make the unit with the end-window probe yield the same readings as the one with the pancake probe. It doesn’t work that way; to put it scientifically – it would throw everything out of whack (esp. between different isotopes and profiles of radiation). This is further explained below.

Geiger counters can have:

(Internally as wands or internally integrated)

Side window probes

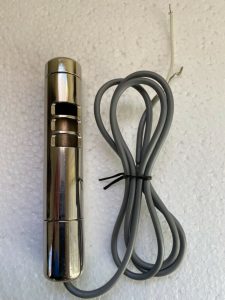
geiger mueller probe

these are the least expensive and also the least sensitive. They often measure beta and gamma (and not alpha). Modern units GQ GMC 300 through GQ GMC 500 have one of these (the 500+ has two) and the typical, vintage, yellow CD-V700 has one by default (you know if it reads from window slotted on the side on the nickle-plated “hot dog” probe). Low-radiation sources (like salt substitute or fertilizer) may not register on this at all, and a uranium glass marble will yield very little reading. Old, active Fiesta Ware ceramic or a thorium lantern mantle should show up just fine. A radium-painted alarm clock will show on these relatively well, even through the clock’s glass. Commercially available rocks (see our affiliate ads to the side!) are read well by these probes unless the specimen is very low-level. Autunite will make it go pleasantly nuts.

End window probes

end window geiger counter probe

these are considerably more sensitive than side-window probes and usually have a thin mica window on the end allowing good alpha particle readings. These are a good compromise between a pancake probe and a side-window probe in price and sensitivity (esp. price). You won’t read a banana as being above background level (which it technically is, due to potassium) but you can get threshold readings from fertilizer etc. and even small, positive hits from occasional, random pieces of granite or quartz that have trace elements with nuclear decay going on. Of course, with it being both more sensitive and also reading alphas, “all the usual suspects” listed above (check source specimens like Fiesta Ware) will make a unit with an end-window probe really sing. It can really be a lot more rewarding than a side-read probe.

Pancake probes

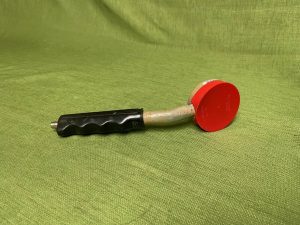
pancake probe for a Geiger Counter

these are the most expensive so far listed, here, and are often about 500% more sensitive than some end-window probes. In fact, if a vintage Geiger counter is fit with a pancake probe like 44-9 and the unit only goes up to 100x scale, a fairly hot collectible rock or an shielded radium clock face may peg the needle, up close. Many units can read a spectacular range of radioactivity with a pancake, though. This kind can be hugely fun, as you can begin to get threshold readings from a banana, a human, get really positive readings from salt substitute or uranium glass, and many random objects. Vintage units like a Ludlum 3 can often be seen sporting a round pancake on the end of its wand, as well as modern Ludlum Geiger counters made in a similar shape. They are also put inside 1-piece units like the GQ’s GMC series’ 600+ model.

Even higher sensitivity — from here the list goes on to more specialized and mainly industrial examples, from alpha probes with far more surface area to, even, scintillator probes that actively amplify weak gamma signals with a photomultiplier tube inside . With a directional scintillator you may detect uranium from across an entire area, helping you play a game of “hotter/colder” when prospecting, but the meter can get pegged with max. input once you get too near the outcrop or source, so you need to shut it off and deploy a lesser sensitive probe unit to look more closely for the rocks.

Further Sensitivity Factors:

Even the three main hobby types, listed above, vary in readings between models (on calibrated, accurate devices) because of:
total probe surface area
tube wall or window thickness
– amount of anode (receiving element) inside

…and other variables.

All Geiger Counter calibration really means, here, is that exact same hardware can be set up to yield exactly the same, expected results. Other than that, the hardware can wildly vary readings from the same sample, and they are, albeit counter-intuitive, all “correct”. New hobbyists can be seen buying a pancake-equipped unit (capable of alpha, beta, and gamma readings) and using it alongside their side-window unit (capable of beta and gamma, only). They often think that if they subtract the side-window’s readings from the pancake’s readings the remainder will be pure alpha, but its just not so. The pancake is also more sensitive to the gamma and beta.

One thought example (surface area, alone):
If I tell you a piece of autunite is yielding 35,000 CPM… is that radiation measured over 2 square cm or 20? In fact, if you want to know how much output the specimen is emitting, would you like to know just from one direction, or 360 degrees around the rock?

For these types of reasons, clinical specs are often cited along with the exact
device
probe
and isotope and distance from it used for calibration

In Conclusion:

We hope we shed some light on types of Geiger counters or features and facts to consider when selecting a Geiger counter. It is largely based on one’s measurement expectations, budget, and even taste.

The nostalgic author’s go-to unit is currently a Victoreen 493 with an end-window probe. I also have a CD V-700 refurbished with solid state hardware, with the standard side-window probe which I am considering modifying with a x200 scale option and a pancake probe. See our article about selecting a vintage Geiger counter.

vintage geiger counters

-- Buy Radioactive Ore --

Hard to find, potent but legal and safe check sources:

You can buy quality radioactive test samples for less money at these fine stores:

buy uranium online

and

Geiger Check Website

Choosing a Vintage Geiger Counter

Many of us find ourselves in the market for a vintage Geiger counter. Like radios and other gear, they have a pleasing, well-built charm.

vintage Geiger Counter CDV-700

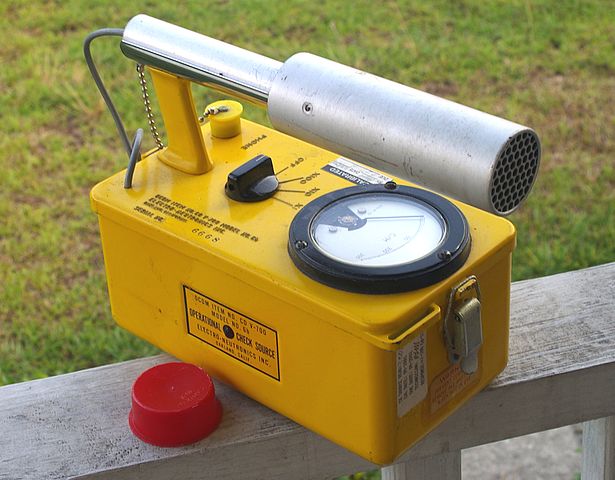
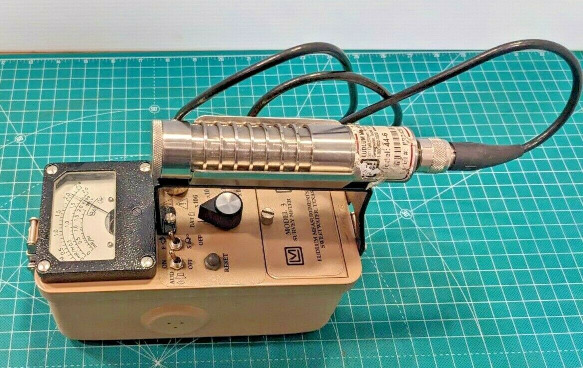
Electro-Neutronics CD V-700 with alpha-sensitive end window probe. Licensed image courtesy of Bullet308

While vintage Geiger counters can be very appealing and economical, we do need to a) keep them running and b) get out of them whatever total functionality we truly require. You may be surprised to find out that even the most basic, old Geiger counter can have its headphones output routed into a modern Windows device to digitally convert and log data! We provide that free software in the links, further down.

Advanced Needs vs. Standard

Two categories emerge in our deciding on the best vintage Geiger counter. We’ll call them Advanced and Standard. We’ll get Advanced out of the way, first, because the majority of this article focuses on the advantages of a particular model well-suited for Standard needs for a number of reasons including community support – the CD V-700 (see Standard, below). More is not necessarily better unless you need it.

Advanced

If we were looking to hook up, drive, and interpret findings of advanced probes like a gamma scintillation probe (a special, amplified probe that can detect very faint or distant traces, as for longer-range prospecting), then a good Ludlum unit for an acceptable price would be up our alley, such as the Ludlum 3 (most of their models that accept an external probe are full-featured units). Ludlum units are very reliable, seemingly made with above-average components, because we find them working fine, without ever having been refurbished (maybe due for calibration), for decades. They are also equipped with advanced features not required for basic readings for typical, exploratory hobby purposes.

Vintage Geiger Counter

Even with the basic, insensitive beta/gamma-only side-read probe, this Ludlum 3 sold on Ebay for well over $600 by seller “my_brain_fart”

For these reasons, it’s usually difficult to find a Ludlum Geiger counter in reliable shape for less than $350, at best, if not much more ($700 or more is common for a nice one) – and be careful of condition, as probes are particularly easily damaged or contaminated. They’re also more complicated and tightly packed with parts if you’re considering working on one inside.

We’re planning a Ludlum for outdoor prospecting, to use to find outcrops at a distance with a scintillation probe, and then approach with our more standard Lionel CD V-700 or Victoreen 493 after we get closer to the right rocks (at which point a scintillator would be overloaded with excess signal). There are other good brands like Bicron, Johnson, and others (even fancy desk units called scalers) but that’s for another article. The Ludlum 3 or similar gets our Advanced vote for Vintage Geiger Counters and is on our 2022 wish list. It’s so popular they still make a similar version of it.

→ Standard ←

The CD V-700 !

When we’re looking to buy a (another) great-looking vintage Geiger counter, we’re looking to save money, and we are using a standard Geiger–Müller probe (possibly even relatively sensitive ones) then our hands-down winner is the CD V-700!

CDV-700 Geiger Counter


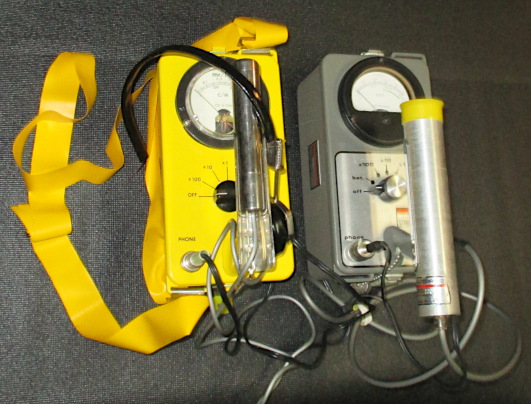
Our refurbished Lionel CD V-700 (left) is very similar to our stock Victoreen 493 (right). We may put the end-window probe on the V-700, recalibrate it, and refurb the Victoreen later.

The CDV-700:
Were produced (and still exist) in countless number
Can be found very inexpensively
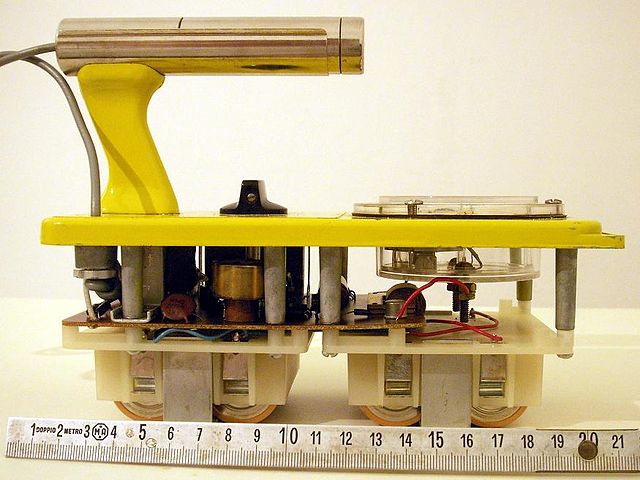
Are easy to repair, as they are simple and spacious inside
Can be modified and upgraded in numerous, well-documented ways
Have considerable technical information available for them
Have plenty of compatible parts and even prefab assemblies available
Are a real piece of world history, connected to Civil Defense

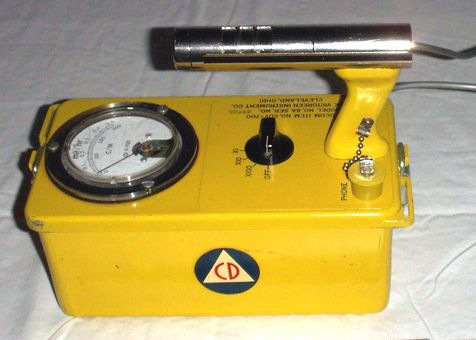
Numerous versions of the CDV-700 were made by a number of companies for Civil Defense issue. Usually colored yellow and emblazoned with the cool, Civil Defense “CD” logo, they were made by the thousand by companies including Lionel, Anton, Electro-Neutronics, and Victoreen.

CDV-700 Vintage Geiger Counter

They are similar in general design to the Ludlum 3 discussed., but would require an inordinate amount of work to adapt to scintillation probes or to accomodate advanced adjustments and functions.

The CDV-700 does employ a standard 900v power supply which will run many, typical probes, anywhere from the stock, side-read, gamma/beta “hot dog” probe, to a thin mica end-window probe, to a pancake probe (each example increasing progressively in sensitivity from first to last). Geiger counters require re-calibration if not other minor adaptations if upgraded in this fashion, but it is a straightforward process.

CD V-700 Resources

There are too many makes of the CDV-700 (some with minor internal differences) to to feature them all the manuals here by exact name, but you will have no problems finding the standard literature for yours doing a simple search. The main thing is to seek out not only the primary users manual (usually called “Instruction and Maintenance Manual”) but also, if available, the Shop Manual. This can be more difficult to find but contains more information. The Shop Manual for the Lionel CD V-700 Geiger counter, at least, is below (along with numerous users manuals). Also, it is the authors’ understanding that the Lionel and Anton units are particularly similar.

Manuals

GeoElectronics CD V-700 Stuff

George Dowell of GeoElectronics is, among other things, a pioneer of refurbishing the CDV-700 (with solid state hardware) as well as modifications and upgrades.

Here he shows how to take an Electro-Neutronics Inc. CDV-700 (dubbed the “ENi”) and use its preferred layout to host the preferred components from the Lionel unit, merging the best of both models into what he calls the “LENi”. He also does various other things like adding a speaker and a built-in pancake probe. You don’t have to intend on doing all of this to get a lot of extra understanding of the CDV-700 Geiger counters with this fabulous article that has been hosted on multiple amateur radio forums:

KFF Homebrew Tips: Geiger Counters in the Ham Shack (at QSL.net)

or:

KFF Homebrew Tips: Geiger Counters in the Ham Shack (at eHam, with comments)

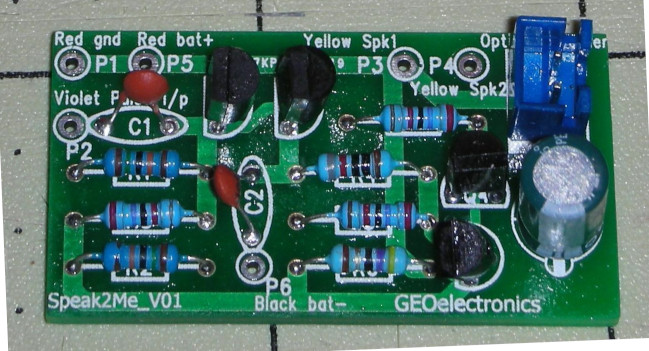
The only sub-link that doesn’t work lately for us is his “Speak2Me” CDV-705 Clone audio module instructions in PDF format, but here is a working HTML copy of that:

Speak2Me CDV-705 Clone Audio Module Instructions

audio module for cd v-700

Parts

GeoElectronics offers key parts for the repair, refurbishing, or modification of your CD V-700. You can find two accounts on Ebay, both valid.

The main one seems to be simply:

geoelectronics

and the other to try is:

geoelectronicsdevices-4-geigercounterenthusiasts

CD V-700... Software?!

One of the advantages of modern (but sometimes joylessly plastic) radiation meters is that they can log data and save the record digitally. Believe it or not, you can do this with the CD V-700 or any other Geiger counter that sends clicks out of an audio jack, using Windows freeware called CDV Counter! We just tested it in Windows 10 and it runs fine!

CDV Counter Freeware for Windows:
SourceForge Download Link for CDV Counter

SciHobby Direct Download:
CDVCOUNTER_EXE.ZIP

Buy Radioactive Specimens

You can buy quality radioactive test samples for less money at these fine stores:

buy uranium online

and

Geiger Check Website

In Closing...

While a Ludlum is on our own wish list for prospecting with a 3-inch-wide gamma scintillation probe (there are some great scintillation probe refurbs and DIY kits on Ebay) we love turning people on to the community support, resources and possibilities still available for the CD V-700 which one may find seriously lacking for many other vintage Geiger counters.

Top 3 Apps for Stop Motion Animation

stop motion animation scene
Courtesy of TDCC
Here we briefly discuss the top three apps for stop motion animation. Whether you have Android or iOS, now, more than ever, there are easy-to-use apps to make short work of a claymation or other stop motion project, right from your go-to device A-Z. For just a few dollars you can get results that put expensive, old,16mm Gumby films to shame.

Clayframes

(Android)

Our Top 3 list is probably the only one that isn’t listing either Stop Motion or esp. Stop Motion Studio as the first of the list. Both of those apps repeatedly get top billing on blog posts only to yield a lot of complaints from folks reviewing apps for stop motion animation. People do tend to paraphrase each other’s blog posts about trending topics, so it could just be force of habit.

Clayframes is a go-to app for educators and grade school institutions because busy rooms full of kids are not great settings for glitches, bugs, and unanswered trouble tickets. Even still, it offers specialized features like onion skinning i.e. viewing multiple frames overlaid (in edit mode, to preview the motion effect freeze-framed), quick frame duplication and looping, soundtrack options, and you can even trigger the “shutter” (next frame) with a hand clap so you don’t wiggle the device.

This app covers stop motion animation and time lapse, both, and you can try it for free to make sure it meshes well with your exact environment before paying the whopping few bucks to upgrade from Lite to the full version offering high resolution, unlimited films and length etc.

Life Lapse Stop Motion Maker

(Android, iPhone, iPad)

Stop motion animation films can be produced entirely from your phone or tablet with this app, as well. It is another app we put above the obligatory Stop Motion Studio listing because, once again, complaints with which people are the most forthcoming in reviews (and there are always some) are less about bugs or counter-intuitive snags with Life Lapse and more to do with whining about whatever isn’t included for free. It’s hard to understand not wanting to thank devs with a dollar amount that’s less than the price of a cup of coffee, esp. when you’re using their software for hours and hours, frame after frame to produce media.

For this reason, Life Lapse Stop Motion Maker made our #2 spot which is also our #1 spot for iOS. It’s easy to use while still being packed with features from all the vital basics to onion skinning, effects, color correction and white balance. There are helpful soundtrack options including some stock, royalty-free music. It even has ghosted image overlay which is like onion skinning except you can choose to see it while you’re still shooting new frames, perhaps to influence nuances about positioning, or the next character movement you haven’t made yet.

This underrated app for stop motion animation should be on your device if you have only one or two that you use or try.

Stop Motion Studio

(Android, iPhone, iPad)

After slamming Stop Motion Studio because we feel people are parroting each other about it too much and it gets too much attention, honestly, it should be on your Android if you only try 3 and your iPhobe or iPad if you only try two. It’s very full-featured, there are a lot of amazing films that owe their existence to it, and one reason for the gripes about minor hitches is simply the sheer number of people using it.

While we recommend starting with the others for the best chance of a more seamless first experience, you still might want to try this one as a quintessential “must” esp. if you’re pretty into doing this. The app is not called Stop Motion Studio for nothing. As far as features listed for the top two apps, you’ll likely find this one has all those and more. Just because they’re popular doesn’t mean you’ll get satisfactory tech support help but, for several bucks, how much help can they afford? There are always ample free forums or folks who will help for a small fee on Fiverr and other sites.

stop motion animation happening with an app

Trigger Warning: Old Man Quote (from the authors):
Gone are the days of paying through the nose for Super 8 film, taking precious few minutes of footage, and then paying through the nose again (four-fold) and waiting two weeks to get it developed in a darkroom. Heck, gone are the days of even needing a DSLR and painstakingly doing the job on a computer. With a little careful savvy you can make a viral video that viewers have no idea is just a person with a phone and nothing else.

How to Make a Cloud Chamber

CloudyLabs cloud chamber

Uranium emitting alpha particles
in a cloud chamber at CloudyLabs

Choosing One

When deciding how to build a cloud chamber, it’s best to consider a few factors before choosing a set of plans. We selected our favorite resource for each of several, simple versions or models, below (and threw in where to get rare, hard-to-find source material as well)!

Keeping it Simple

Most visitors want to take a simple route rather than making formidable project out of it, as is required for professional models with electrically-powered coolers and heaters. We’ll link those, as well, but the easiest types use simple materials that are readily available. Versions range anywhere from a mere petri dish on a slab of dry ice, to professional thermoelectric units generating their own warm or cold regions, or even models that control the paths of detected particles. We’ll feature a separate article on the latter, most sophisticated types.

Easiest Builds Use Dry Ice

cloud chamber dry ice 

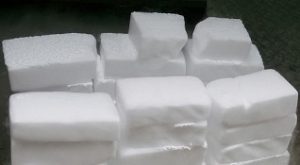
Note: When we refer to “dry ice” we mean genuine, frozen CO2, not those reusable cooler packs or plastic containers full of frozen media often called “dry ice” by some companies. Real dry ice is surprisingly available in the US. Supermarkets such as Publix and Walmart have begin carrying dry ice under brands such as Penguin, just ask management or customer service..

Warning: Frozen, solid CO2 dry ice is cold enough to cause damage to your bodily tissues with more than a quick poke, so you cannot safely handle it without thick insulation or tongs etc.. Also, a lot of dry ice in a confined area can cause unsafe levels of CO2, but that concern has more to do with large quantities or people trying to immerse themselves in its fog.

Winner of the the elegantly simple award:
The Dept. of Energy’s Jefferson Lab shows how to build cloud chamber from a petri dish, felt, and 91% rubbing alcohol (not 70%).

A step up:

#1 in Popularity (with dry ice)

Below is how to construct the quintessential favorite cloud chamber with the fumes raining down from a sponge on the ceiling of a more substantial, aquarium-like container. Still, we’re talking about few items even from a dollar store fitting the bill, but for a spectacular show. It doesn’t have to be this large (such as in the Without Dry Ice version further down – that one has a very common, smaller dollar store clear breakfast cereal “tank”).

The US LHC (of CERN) provides a concise tutorial for making this all-time favorite version:

What’s great is they also offer the accompanying S’Cool Lab manual in PDF free for download:
PDF Instruction Set Download Link

Symmetry Magazine‘s Step by Step version of the same type:
How to Build a Cloud Chamber (with dry ice)

How to Make a Cloud Chamber Without Dry Ice

You may pursue building a cloud chamber without dry ice, using gel packs or polymers, particularly if you have no easy access to dry ice.

The construction requirements are slightly more involved, however, when substituting polymer in place of dry ice. So, if you do have access to dry ice, you may decide the dry ice model is the easiest route for you (and a little more foolproof, it seems, with a couple fewer variable).

The project is similar for both the simple DIY models of could chamber, whether they use dry ice or freezer gel packs but, because the gel packs are not as cold, the no-dry-ice-required model includes a couple of extra, special needs. It requires a minimum vertical height and it requires added heat on top, like a reservoir of hot water which is not really required for dry ice models for an adequate temperature gradient above to cold floor.

Note – The following is not mentioned in the video but is important:
You can see the bottom reservoir (functioning as the cloud chamber) is taller than the one on top. Harold Henderson’s experiments showed that this extra, vertical space was necessary (versus using two the same size as the shorter, top container) i.e. a good 15 or 20cm cloud chamber height is needed for the no-dry-ice version.

Professor Paul Looyen of Physics High hosts the world’s most popular video how to build a cloud chamber without dry ice:

If you’d like to get into various methods of electrically powering methods of heating or cooling, experimenting with supposedly making the trails more visible with a high voltage differential field, or hijacking particles and directing them with electromagnetic fields, we’ll soon feature a new article on those. For now, get your feet wet and keep it simple. 

Finding radioactive source material:

It’s the most fun seeing or measuring radioactivity when you can compare a collection  of check sources ranging from lower to higher (staying safe, of course, with proper information, handling, and storage).

Uranium glass and 2% thorium, tungsten welding rods, and maybe a vintage gas lantern mantle are available everywhere, but the rarer check sources on the higher end of safe and legal (like uranium mica crystals, or desert rocks with unusually high ore inclusions) can be expensive or hard to find. When you want the piece de resistance or grand finale  to look like fireworks in the cloud chamber, we suggest:

buy uranium ore
Uranium samples to purchase

(must be 18 or older to purchase ore)